mNo edit summary |
|||
| (35 intermediate revisions by 22 users not shown) | |||
| Line 1: | Line 1: | ||
{{Infobox world |
{{Infobox world |
||
| ⚫ | |||
| ⚫ | |||
| − | |jiggies needed = None |
||
|image = Gruntys_Lair_entry.png |
|image = Gruntys_Lair_entry.png |
||
| ⚫ | |||
| ⚫ | |||
| + | |type = Hub World / Overworld |
||
| ⚫ | |||
| ⚫ | |||
| + | Evil Lair |
||
| + | |prerequisite = none |
||
| + | |token = none |
||
| + | |honeycomb = none |
||
| ⚫ | |||
| ⚫ | |||
:[[Mumbo's Mountain]] |
:[[Mumbo's Mountain]] |
||
:[[Treasure Trove Cove]] |
:[[Treasure Trove Cove]] |
||
| Line 18: | Line 22: | ||
Outside of these nine worlds, there are a number of different rooms and sub-areas. The hat on top of the lair is actually a tower, which ultimately leads to the roof where the final battle against Gruntilda takes place in ''[[Banjo-Kazooie]]''. Unlike most main antagonists' lairs, Gruntilda's Lair actually serves as a hub world of the first game. |
Outside of these nine worlds, there are a number of different rooms and sub-areas. The hat on top of the lair is actually a tower, which ultimately leads to the roof where the final battle against Gruntilda takes place in ''[[Banjo-Kazooie]]''. Unlike most main antagonists' lairs, Gruntilda's Lair actually serves as a hub world of the first game. |
||
| − | When Banjo and Kazooie visit the lair again in ''[[Banjo-Tooie]]'', the lair has been severely wrecked |
+ | When Banjo and Kazooie visit the lair again in ''[[Banjo-Tooie]]'', the lair has been severely wrecked. The large portrait of Gruntilda on the wall has a huge hole in it and is slightly zoomed-in. The entrance to the left leading to the room with Gruntilda's face in the center as well as the puzzle pictures for Treasure Trove Cove and Clanker's Cavern is blocked by rocks and the entrance to the right leading to Mumbo's Mountain is also blocked by rocks. The player's only use of visiting this area is visiting [[Cheato]]. |
During ''[[Banjo-Kazooie: Nuts & Bolts]]'', the lair is inaccessible but visible from the outside in Spiral Mountain (probably to make you focus on [[L.O.G.]]'s and Grunty's Challenges). |
During ''[[Banjo-Kazooie: Nuts & Bolts]]'', the lair is inaccessible but visible from the outside in Spiral Mountain (probably to make you focus on [[L.O.G.]]'s and Grunty's Challenges). |
||
| Line 24: | Line 28: | ||
==Points of Interest== |
==Points of Interest== |
||
*Grunty Portrait #1 (Only slightly able to be seen in [[Banjo-Tooie]] only with a hole in it and slightly Zoomed-In.) |
*Grunty Portrait #1 (Only slightly able to be seen in [[Banjo-Tooie]] only with a hole in it and slightly Zoomed-In.) |
||
| − | *[[Mumbo's Mountain]] |
+ | *Mayahem Peak ([[Mumbo's Mountain]] room) (Mumbo's Mountain Puzzle) |
*Grunty Round Floor Tile (Treasure Trove Cove Puzzle) (Clanker's Cavern Puzzle) |
*Grunty Round Floor Tile (Treasure Trove Cove Puzzle) (Clanker's Cavern Puzzle) |
||
*Waterfall Room |
*Waterfall Room |
||
*[[Click Clock Wood]] Puzzle Room |
*[[Click Clock Wood]] Puzzle Room |
||
| − | *[[Treasure Trove Cove]] |
+ | *[[Banjoland]]'s Epic Toy chest ([[Treasure Trove Cove]] room) |
| − | *Pipe Drainage Room ([[Clanker's Cavern]] |
+ | *Pipe Drainage Room ([[Clanker's Cavern]] room) |
| ⚫ | |||
| − | * |
+ | *[[Grunty]] Statue Island |
| ⚫ | |||
| + | *Swamp Room ([[Bubblegloop Swamp]] room)([[Freezeezy Peak]] Puzzle) |
||
| ⚫ | |||
| + | *Giant Stone Urn |
||
| ⚫ | |||
*Grunty Face Statue |
*Grunty Face Statue |
||
| − | * |
+ | *Advent Room ([[Freezeezy Peak]] room) |
*Lava Room ([[Gobi's Valley]] Puzzle) |
*Lava Room ([[Gobi's Valley]] Puzzle) |
||
| − | *Cemetery ([[Mad Monster Mansion]] |
+ | *Cemetery ([[Mad Monster Mansion]] room) |
*[[Mumbo]]'s Shack |
*[[Mumbo]]'s Shack |
||
| − | *Water-Level Raising Room |
+ | *Water-Level Raising Room (Mad Monster Mansion Puzzle) |
| − | *Grunty's Port ( |
+ | *Grunty's Port (Rusty Bucket bay Room) |
| + | *Storage ([[Rusty Bucket Bay]] Puzzle) |
||
| − | *[[Click Clock Wood]] |
+ | *Woods ([[Click Clock Wood]] room) |
*[[Grunty's Furnace Fun]] Room |
*[[Grunty's Furnace Fun]] Room |
||
| + | *[[Grunty's Furnace Fun]] Atrium |
||
| ⚫ | |||
| + | <gallery type="slideshow"> |
||
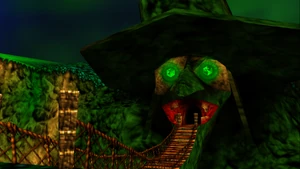
| + | Fungus Forest entry.png|Fungi Forest Room/Click Clock Wood Puzzle |
||
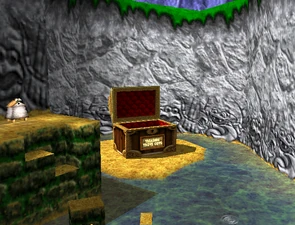
| + | Treasure Trove Cove entry.png|TTC Room |
||
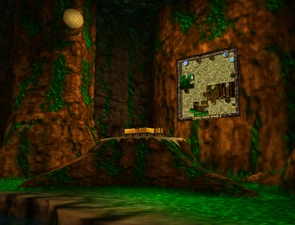
| + | Gruntys Lair entry.png|Bridge Walkway |
||
| + | </gallery> |
||
| ⚫ | |||
*Grunty Portrait #2 (Top of the Tower Puzzle) |
*Grunty Portrait #2 (Top of the Tower Puzzle) |
||
*[[Dingpot]]'s Room |
*[[Dingpot]]'s Room |
||
| Line 101: | Line 114: | ||
*[[Ticker]] - Appears in the [[Mumbo's Mountain]] room, after Mumbo's Mountain has been accessed. |
*[[Ticker]] - Appears in the [[Mumbo's Mountain]] room, after Mumbo's Mountain has been accessed. |
||
*[[Snippet]] - Appears in the [[Treasure Trove Cove]] room, after Treasure Trove Cove has been accessed. |
*[[Snippet]] - Appears in the [[Treasure Trove Cove]] room, after Treasure Trove Cove has been accessed. |
||
| − | *[[Shrapnel]] - Appears in the [[Clanker's Cavern]] room, after Treasure Trove Cove has been accessed. |
+ | *[[Shrapnel]] - Appears in the [[Clanker's Cavern]] room and the 450 note room, after Treasure Trove Cove has been accessed. |
| − | *[[Grille Chompa]] - Appears in the [[Clanker's Cavern]] room, after Clanker's Cavern has been accessed. |
+ | *[[Grille Chompa]] - Appears in the [[Clanker's Cavern]] room and the Rusty Bucket Bay room, after Clanker's Cavern has been accessed. |
*[[Buzzbomb]] - Appears in the [[Bubblegloop Swamp]] room, after Bubblegloop Swamp has been accessed. |
*[[Buzzbomb]] - Appears in the [[Bubblegloop Swamp]] room, after Bubblegloop Swamp has been accessed. |
||
*[[Sir Slush]] - Appears in the [[Freezeezy Peak]] room, after Freezeezy Peak has been accessed. |
*[[Sir Slush]] - Appears in the [[Freezeezy Peak]] room, after Freezeezy Peak has been accessed. |
||
*[[Chinker]] - Appears in the [[Freezeezy Peak]] puzzle room, after Freezeezy Peak has been accessed. |
*[[Chinker]] - Appears in the [[Freezeezy Peak]] puzzle room, after Freezeezy Peak has been accessed. |
||
| − | *[[Mum-mum |
+ | *[[Mum-mum]] - Appears in the [[Gobi's Valley]] room, after Gobi's Valley has been accessed. |
| + | *[[Scabby]] - Appears in the [[Gobi's Valley]] room, after Gobi's Valley has been accessed. |
||
*[[Ripper]] - Appears in the [[Mad Monster Mansion]] room, after Mad Monster Mansion has been accessed. |
*[[Ripper]] - Appears in the [[Mad Monster Mansion]] room, after Mad Monster Mansion has been accessed. |
||
| + | *[[Tee-hee]] - Appears in Mumbo's Hut in the [[Mad Monster Mansion]] room, after Mad Monster Mansion has been accessed. |
||
*[[Flotsam]] - Appears in the [[Rusty Bucket Bay]] room, after Rusty Bucket Bay has been accessed. |
*[[Flotsam]] - Appears in the [[Rusty Bucket Bay]] room, after Rusty Bucket Bay has been accessed. |
||
*[[Big Clucker]] - Appears in the [[Click Clock Wood]] room, after Click Clock Wood has been accessed. |
*[[Big Clucker]] - Appears in the [[Click Clock Wood]] room, after Click Clock Wood has been accessed. |
||
| Line 125: | Line 140: | ||
==Gallery== |
==Gallery== |
||
| − | + | {{See also|Gruntilda's Lair/Gallery}} |
|
| + | |||
==Trivia== |
==Trivia== |
||
| + | *Grunty's laughter can still be heard echoing throughout her lair after defeating her in ''Banjo-Kazooie'', even though she's trapped underneath a huge boulder in Spiral Mountain. |
||
| − | *In Banjo-Kazooie:Grunty's Revenge, a statue of [http://banjokazooie.wikia.com/wiki/King_Jingaling King Jingaling's] head can be seen laying on the ground outside [http://banjokazooie.wikia.com/wiki/Grunty's_Castle Grunty's Castle]. This could imply that at one point King Jingaling wanted to settle in Spiral Mountain with his [http://banjokazooie.wikia.com/wiki/Jinjo people], but was overtaken by Grunty. This could have something to do with the dispute between Grunty and the Jinjos, and why she captures them on Banjo-Kazooie, and imprisons them in Banjo-Tooie. |
||
| + | *In ''Banjo-Kazooie'', the bridge to Grunty's Lair will be broken if Banjo & Kazooie have not yet learned all of the moves that [[Bottles]] teaches them in Spiral Mountain. Amusingly, this bridge is in a similar state of disrepair in ''Banjo-Tooie''. |
||
| − | *The first few bars of the theme music to Grunty's Lair |
+ | *The first few bars of the theme music to Grunty's Lair are inspired by "[[wikipedia:Teddy Bears' Picnic|The Teddy Bears' Picnic]]", a famous children's song. |
| − | *Although they were seperate game levels in the first game, the enterence to the lair was all the player got go in in the game's sequel, [[Banjo-Tooie]] and was then part of the Spiral Mountain level within the game. |
||
| + | *A small section of Grunty's Lair appears as a sub-area of Spiral Mountain in ''[[Banjo-Tooie]]''. Only the entrance is accessible since the lair has suffered cave-ins, but a small new alcove has also opened up behind the tattered portrait of Gruntilda. |
||
| + | ** Unused text strings within the code of ''Banjo-Tooie'' and some modelling differences between ''Kazooie'' and ''Tooie'' suggest that the "Tower Room" of Gruntilda's Lair was once going to be accessible through the central window above the entrance to Grunty's Lair. |
||
| + | * ''Banjo-Tooie'''s version of the music for Grunty's Lair is abridged, and no longer features Grunty's laughter in the background since she's absent from the area in this game. |
||
| + | * In ''[[Banjo-Kazooie: Grunty's Revenge]]'', a broken rock sculpture of [[King Jingaling|King Jingaling's]] head can be seen lying in the undergrowth beneath [[Grunty's Castle]]. This seems to imply that at one point King Jingaling had settled in Spiral Mountain with his [[Jinjo|people]], but their home was invaded by Grunty. This could explain why there are so many captive Jinjos in ''Banjo-Kazooie'''s worlds, and may suggest that the sleeping [[Jinjonator]] predates Grunty's Lair. |
||
| + | *The tower of Gruntilda's Lair can be seen in the background of [[Showdown Town]] in ''[[Banjo-Kazooie: Nuts & Bolts]]''. |
||
| + | *The position of the Lair entrance's gemstone eyes varies throughout each of the series' games. In ''Banjo-Kazooie'' both of her green eyes are present. In ''Banjo-Tooie'' her left eye is missing. In ''Banjo-Kazooie: Nuts & Bolts'' her right eye is missing, not the left eye, and it is an object that Kazooie can pick up. |
||
{{BKWorlds}} |
{{BKWorlds}} |
||
[[de:Gruntys Reich]] |
[[de:Gruntys Reich]] |
||
| + | [[Category:Trivia]] |
||
Revision as of 23:53, 19 February 2020
Gruntilda's Lair is the lair of the evil witch Gruntilda before her first defeat by Banjo and Kazooie. During Banjo-Kazooie, most of the game is set in this massive area. Within the lair itself, there are entrances to nine different worlds:
- Mumbo's Mountain
- Treasure Trove Cove
- Clanker's Cavern
- Bubblegloop Swamp
- Freezeezy Peak
- Gobi's Valley
- Mad Monster Mansion
- Rusty Bucket Bay
- Click Clock Wood
Outside of these nine worlds, there are a number of different rooms and sub-areas. The hat on top of the lair is actually a tower, which ultimately leads to the roof where the final battle against Gruntilda takes place in Banjo-Kazooie. Unlike most main antagonists' lairs, Gruntilda's Lair actually serves as a hub world of the first game.
When Banjo and Kazooie visit the lair again in Banjo-Tooie, the lair has been severely wrecked. The large portrait of Gruntilda on the wall has a huge hole in it and is slightly zoomed-in. The entrance to the left leading to the room with Gruntilda's face in the center as well as the puzzle pictures for Treasure Trove Cove and Clanker's Cavern is blocked by rocks and the entrance to the right leading to Mumbo's Mountain is also blocked by rocks. The player's only use of visiting this area is visiting Cheato.
During Banjo-Kazooie: Nuts & Bolts, the lair is inaccessible but visible from the outside in Spiral Mountain (probably to make you focus on L.O.G.'s and Grunty's Challenges).
Points of Interest
- Grunty Portrait #1 (Only slightly able to be seen in Banjo-Tooie only with a hole in it and slightly Zoomed-In.)
- Mayahem Peak (Mumbo's Mountain room) (Mumbo's Mountain Puzzle)
- Grunty Round Floor Tile (Treasure Trove Cove Puzzle) (Clanker's Cavern Puzzle)
- Waterfall Room
- Click Clock Wood Puzzle Room
- Banjoland's Epic Toy chest (Treasure Trove Cove room)
- Pipe Drainage Room (Clanker's Cavern room)
- Jungle Lot (Bubblegloop Swamp Puzzle)
- Grunty Statue Island
- Swamp Room (Bubblegloop Swamp room)(Freezeezy Peak Puzzle)
- Giant Stone Urn
- Mummy's Tomb (Gobi's Valley room)
- Grunty Face Statue
- Advent Room (Freezeezy Peak room)
- Lava Room (Gobi's Valley Puzzle)
- Cemetery (Mad Monster Mansion room)
- Mumbo's Shack
- Water-Level Raising Room (Mad Monster Mansion Puzzle)
- Grunty's Port (Rusty Bucket bay Room)
- Storage (Rusty Bucket Bay Puzzle)
- Woods (Click Clock Wood room)
- Grunty's Furnace Fun Room
- Grunty's Furnace Fun Atrium
- Transformation Room
- Grunty Portrait #2 (Top of the Tower Puzzle)
- Dingpot's Room
- Red Honeycomb Puzzle
- Top of the Tower
Maps
Please make one and upload it!
Worlds
- Mumbo's Mountain
- Treasure Trove Cove
- Clanker's Cavern
- Bubblegloop Swamp
- Freezeezy Peak
- Gobi's Valley
- Mad Monster Mansion
- Rusty Bucket Bay
- Click Clock Wood
Collectibles
Jiggies
Note that Jiggies 2-10 can only be collected after the corresponding world's Witch Switch has been pressed.
- Left of the main entrance.
- On top of the entrance to Mumbo's Mountain - access as termite. (Mumbo's Mountain)
- On top of the ship near the entrance to Treasure Trove Cove - climb on cannon. (Treasure Trove Cove)
- Beak Bust Gruntilda's eyes on the flat disc with her portrait. (Clanker's Cavern)
- Jump inside the gold urn in the room just before Gobi's Valley - use jump pad activated through a room blocked by a breakable brick wall. (Bubblegloop Swamp)
- In alcove high above the entrance to Freezeezy Peak - use flying pad under cobweb in nearby room- activate pad with switch in a lower alcove, and use running shoes to reach pad in time. (Freezeezy Peak)
- Inside the stone coffin in the room with the gold urn - use jump pad. (Gobi's Valley)
- Break the glass eye in the Gruntilda head - use flying pad under cobweb. (Mad Monster Mansion)
- In alcove leading to the level 3 water switch. (Rusty Bucket Bay)
- In alcove above the entrance to the Click Clock Wood area - access as bee. (Click Clock Wood)
Extra Lives
- On the back of the Huge Grunty Statue's hat.
- At the Bubblegloop Swamp entrance room, near the 3 logs, jump to the top of the middle one.
- In the Mad Monster Mansion Puzzle room, after pushing the second water raise switch, go to the surface and you should see an Extra life.
- Behind Mumbo's Shack (the house you can only enter if you're a pumpkin inside the graveyard).
- Located behind some roots, in the room with the Click Clock Wood Puzzle.
- Behind the entrance to Click Clock Wood, walk in the grass until Banjo rises a little out of the grass. Banjo is on top of a Shock Spring Pad! Use it to jump on top the Click Clock Wood entrance and collect an Extra life. You may also use the Bee transformation to get it.
- Located on a window ledge near the last yellow Cauldron, after completing Grunty's Furnace Fun.
- There are four extra lives inside Grunty's Furnace Fun.
Enemies
Gruntilda's Lair hosts a variety of enemies, some exclusive to the lair itself and others which only appear after their native world has been accessed.
World Enemies
- Ticker - Appears in the Mumbo's Mountain room, after Mumbo's Mountain has been accessed.
- Snippet - Appears in the Treasure Trove Cove room, after Treasure Trove Cove has been accessed.
- Shrapnel - Appears in the Clanker's Cavern room and the 450 note room, after Treasure Trove Cove has been accessed.
- Grille Chompa - Appears in the Clanker's Cavern room and the Rusty Bucket Bay room, after Clanker's Cavern has been accessed.
- Buzzbomb - Appears in the Bubblegloop Swamp room, after Bubblegloop Swamp has been accessed.
- Sir Slush - Appears in the Freezeezy Peak room, after Freezeezy Peak has been accessed.
- Chinker - Appears in the Freezeezy Peak puzzle room, after Freezeezy Peak has been accessed.
- Mum-mum - Appears in the Gobi's Valley room, after Gobi's Valley has been accessed.
- Scabby - Appears in the Gobi's Valley room, after Gobi's Valley has been accessed.
- Ripper - Appears in the Mad Monster Mansion room, after Mad Monster Mansion has been accessed.
- Tee-hee - Appears in Mumbo's Hut in the Mad Monster Mansion room, after Mad Monster Mansion has been accessed.
- Flotsam - Appears in the Rusty Bucket Bay room, after Rusty Bucket Bay has been accessed.
- Big Clucker - Appears in the Click Clock Wood room, after Click Clock Wood has been accessed.
Names in Other Languages
| Language | Name | Meaning |
|---|---|---|
| Japanese | グランチルダのとりで Guranchiruda no Toride |
Gruntilda's Fortress |
| Spanish | La Guarida de Gruntilda (BT) | Gruntilda's Lair |
| French | Tanière de Gruntilda | Gruntilda's Lair |
| German | Gruntildas Reich | Gruntilda's Realm |
| Italian | Antro di Gruntilda | Gruntilda's Antrum |
Gallery
Trivia
- Grunty's laughter can still be heard echoing throughout her lair after defeating her in Banjo-Kazooie, even though she's trapped underneath a huge boulder in Spiral Mountain.
- In Banjo-Kazooie, the bridge to Grunty's Lair will be broken if Banjo & Kazooie have not yet learned all of the moves that Bottles teaches them in Spiral Mountain. Amusingly, this bridge is in a similar state of disrepair in Banjo-Tooie.
- The first few bars of the theme music to Grunty's Lair are inspired by "The Teddy Bears' Picnic", a famous children's song.
- A small section of Grunty's Lair appears as a sub-area of Spiral Mountain in Banjo-Tooie. Only the entrance is accessible since the lair has suffered cave-ins, but a small new alcove has also opened up behind the tattered portrait of Gruntilda.
- Unused text strings within the code of Banjo-Tooie and some modelling differences between Kazooie and Tooie suggest that the "Tower Room" of Gruntilda's Lair was once going to be accessible through the central window above the entrance to Grunty's Lair.
- Banjo-Tooie's version of the music for Grunty's Lair is abridged, and no longer features Grunty's laughter in the background since she's absent from the area in this game.
- In Banjo-Kazooie: Grunty's Revenge, a broken rock sculpture of King Jingaling's head can be seen lying in the undergrowth beneath Grunty's Castle. This seems to imply that at one point King Jingaling had settled in Spiral Mountain with his people, but their home was invaded by Grunty. This could explain why there are so many captive Jinjos in Banjo-Kazooie's worlds, and may suggest that the sleeping Jinjonator predates Grunty's Lair.
- The tower of Gruntilda's Lair can be seen in the background of Showdown Town in Banjo-Kazooie: Nuts & Bolts.
- The position of the Lair entrance's gemstone eyes varies throughout each of the series' games. In Banjo-Kazooie both of her green eyes are present. In Banjo-Tooie her left eye is missing. In Banjo-Kazooie: Nuts & Bolts her right eye is missing, not the left eye, and it is an object that Kazooie can pick up.
| Worlds | Mumbo's Mountain · Treasure Trove Cove · Clanker's Cavern · Bubblegloop Swamp · Freezeezy Peak · Gobi's Valley · Mad Monster Mansion · Rusty Bucket Bay · Click Clock Wood |
|---|---|
| Overworld | Spiral Mountain · Gruntilda's Lair · Grunty's Furnace Fun · Top of the Tower |
| Cut Worlds | Fungus Forest · Mount Fire Eyes · Temple Test Level |