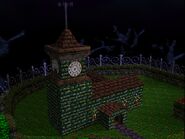
(→Trivia) |
|||
| (27 intermediate revisions by 13 users not shown) | |||
| Line 1: | Line 1: | ||
{{Infobox world |
{{Infobox world |
||
| ⚫ | |||
|game = ''[[Banjo-Kazooie]]'' ''[[Banjo-Kazooie (Xbox Live Arcade)|(XBLA)]]'' |
|game = ''[[Banjo-Kazooie]]'' ''[[Banjo-Kazooie (Xbox Live Arcade)|(XBLA)]]'' |
||
| + | |type = Level |
||
|theme = Haunted Mansion |
|theme = Haunted Mansion |
||
| + | |token = 9 |
||
| − | |jiggies needed = 10 |
||
| + | |honeycomb = 2 |
||
| ⚫ | |||
|transformation = [[Pumpkin Banjo|Pumpkin]] |
|transformation = [[Pumpkin Banjo|Pumpkin]] |
||
| + | |prerequisite = 10 Jiggies |
||
| − | }} '''Mad Monster Mansion''' is the seventh world accessed from [[Gruntilda's Lair]] in ''[[Banjo-Kazooie]]''. It is also the smallest world geographically in ''Banjo-Kazooie.'' However, it is one of the most difficult and complex. |
||
| + | |previous = [[Gobi's Valley]] |
||
| + | |next = [[Rusty Bucket Bay]] |
||
| + | }}'''Mad Monster Mansion''' is the seventh world [[Banjo]] and [[Kazooie]] visit in [[Banjo-Kazooie]]. The entrance to this world is located in the Graveyard section of [[Gruntilda's Lair]]; this area is past the "Lava Room" on the sixth floor of Gruntilda's Lair. Its picture is located on the seventh floor, specifically the third room you enter through underwater passages. The picture requires 10 [[Jiggies]] to complete. |
||
==Points of Interest== |
==Points of Interest== |
||
| Line 21: | Line 26: | ||
**Graveyard |
**Graveyard |
||
| − | == |
+ | ==Moves Learned== |
| − | + | ===None=== |
|
| + | |||
| + | ==Transformation== |
||
| + | *Pumpkin (requires 20 Mumbo Tokens) |
||
==Maps== |
==Maps== |
||
| Line 33: | Line 41: | ||
==Collectibles== |
==Collectibles== |
||
===[[Jiggy|Jiggies]]=== |
===[[Jiggy|Jiggies]]=== |
||
| + | #'''Enter the Well''': A Jiggy is located inside the well. This Jiggy is accessible as [[Banjo]] or the [[Pumpkin]] transformation. |
||
| − | #At the bottom of the well near the glowing pool. Enter as a pumpkin, and jump in the small hole in the bucket. |
||
| + | #'''Copy Motzand's Tune''': Gain access to the church by [[Beak Bust]]ing a clock switch near the Blue [[Jinjo|Jinjo's]] location and running to the entrance before the door closes. You will need to equip the pair of [[Turbo Trainers]] and break down the gate leading into the churchyard to enter the church. Once inside, climb up to the organ's scoresheet and Motzand will begin playing keys on his organ. Beak Bust the keys he plays in the order he plays them and after 2 sessions, he will dissipate and a Jiggy will appear at the top of the organ. |
||
| − | #Copy the music played by [[Motzand]] in the church. The Jiggy will appear on the highest pipe on the organ. |
||
| + | #'''Clear the [[Tumblar Minigame]].''' |
||
| − | #Inside the shed, move onto each letter to form the word "BANJOKAZOOIE". (''See [[Spell Out BANJOKAZOOIE with Tumblar]]'') |
||
| + | #'''Help the Pots''': Around the churchyard are 5 brown pots. Shoot Eggs from Kazooie's behind into each pot and a Jiggy will pop out of the last one. |
||
| − | #Drop eggs into all the plant pots in the Church's graveyard to receive it. |
||
| − | #At the top of the church tower. Use the gravestone near the entrance to |
+ | #'''Scale the Church''': At the top of the church tower. Use the gravestone near the entrance to climb up. |
| − | # |
+ | #'''Nab from Napper''': Ascend to the very top of the mansion and fall through the chimney. Once inside, jump across the chairs onto the dining table ''without'' landing on the creaky floor below. Once on the table, simply walk through Napper to collect the Jiggy. If the player attempts to enter this room through the front entrance or the player lands on the floor, Napper will solidfy and the Jiggy will be unobtainable until the duo leaves the room. |
| − | # |
+ | #'''Break the Barrels''': Beak Bust the hatch leading into the cellar just outside the churchyard gate. Inside the cellar, break open the southernmost barrel on the left to find the Jiggy. |
| + | #'''Inside [[Loggo]]''': Break open the window on the second floor, using a Rat-a-tat-rap, that leads into the bathroom. Afterwards, transform into the Pumpkin and ascend to the second floor of the mansion (a small gap near the hedge maze in the churchyard leads to a ramp, granting access to the second floor and is also required for Jiggy #9). Enter the bathroom and jump into Loggo. You will be flushed into the sewers and the Jiggy will be between several [[Whipcrack]]s and [[Grille Chompa]]s. |
||
| − | #Inside [[Loggo]] the toilet. Reach him by smashing the windows on top of the mansion. Then go to him as a pumpkin and jump inside. |
||
| + | #'''Inside the Gutter Basin''': Using the same ramp from the previous Jiggy, access the second floor of the mansion as the Pumpkin and locate a small hole on one of the corners of the gutters. Sit still on the hole and you will fall into the basin below. The airborne Jiggy will be collected as you drop in. |
||
| − | #As a pumpkin, jump into the pipe near the top of the mansion. |
||
| − | #Find all 5 Jinjos. |
+ | #'''Find all 5 Jinjos'''. |
===[[Jinjo]]s=== |
===[[Jinjo]]s=== |
||
| − | *'''<font color="#0000ff">Blue</font>''' - On the fountain. Use the [[Shock Spring Pad]]. |
+ | *'''<font color="#0000ff">Blue</font>''' - On the fountain near the entrance to the world. Use the [[Shock Spring Pad]] to reach it. |
| − | *'''<font color="#008000">Green</font>''' - |
+ | *'''<font color="#008000">Green</font>''' - At the top of the mansion. |
| − | *'''<font color="#ff4500">Orange</font>''' - At the far corner of the maze. |
+ | *'''<font color="#ff4500">Orange</font>''' - At the far corner of the hedge maze. |
| − | *'''<font color="fuchsia">Purple</font>''' - In |
+ | *'''<font color="fuchsia">Purple</font>''' - In the third barrel on the right in the cellar. |
| − | *'''<font color="#ffff00">Yellow</font>''' - On |
+ | *'''<font color="#ffff00">Yellow</font>''' - On top of the canopy bed, located via a third floor window. Use the Shock Spring Pad to reach it. |
===[[Extra Honeycombs]]=== |
===[[Extra Honeycombs]]=== |
||
| + | *Inside the second floor room, opposite the bathroom. You will need to access this room as the Pumpkin as the Honeycomb Piece is under the floorboards. (Use the same technique from Jiggies #8 and #9 to reach the room.) |
||
| − | *As a pumpkin, search under the floorboards of a room on the middle floor. |
||
| − | * |
+ | *Hovering over the wooden rafters inside the church. |
===[[Witch Switch]]=== |
===[[Witch Switch]]=== |
||
| + | *Located on the rafters of the church. This spawns a Jiggy in one of the eyes of the big Grunty statue on the sixth floor of Gruntilda's Lair (the room with cobwebs). Either use the Flying Pad from the Freezeezy Peak Witch Switch Jiggy to obtain it, or simply jump down from the brim of the statue and Rat-a-tat-rap the glass to collect it. |
||
| − | *Inside the church, fly up onto the rafters. A Jiggy appears in the eye of Grunty's statue in the large room with cobwebs. |
||
===[[Mumbo Token]]s=== |
===[[Mumbo Token]]s=== |
||
| − | *In the Hedge Maze |
+ | *In the Hedge Maze. |
*On top of Tumblar's Shack |
*On top of Tumblar's Shack |
||
*In the left fire flame inside the Dining Room's fireplace. |
*In the left fire flame inside the Dining Room's fireplace. |
||
| − | *In one of the 1881 barrels in the |
+ | *In one of the 1881 barrels in the cellar. * |
| − | * |
+ | *Inside the sewers. * |
| ⚫ | |||
| − | *By a gravestone by the Haunted Church |
||
| − | * |
+ | *Behind a gravestone by the Haunted Church. |
| + | *Inside the church clocktower. |
||
| ⚫ | |||
| − | *In |
+ | *In the bathroom sink. |
| + | *In the bedroom with the Yellow Jinjo, hidden behind a dresser. |
||
| − | *High atop the inside of the Church |
||
| + | *On the narrow middle section of the church rafters. |
||
| + | *Under the Whipcrack guarding the Blue Jinjo. |
||
| + | *In a corner near the fountain. |
||
| + | *In a corner near Tumblar's Shack. |
||
| + | *Next to the small hedge ramp where the Pumpkin ascends to the second floor. |
||
| + | *On the stool inside the church. |
||
| + | Oddly, the Mumbo Tokens marked with (*) are treated by the game as the same Mumbo Token. So collecting one will cause the other to disappear. This essentially means there are a total of 116 Mumbo Tokens in the game, though only 115 are obtainable. This [http://www.therwp.com/forums/showthread.php?t=48909 forum] remarks on this. However, as stated in [https://youtu.be/vpR4V8RPzB0?t=9m27s this video], it is possible to collect both tokens. As long as you have viewed both Mumbo Tokens (i.e. breaking the barrel cover in the cellar and seeing the token inside of Loggo), both can be collected without the other disappearing. |
||
===[[Extra Life|Extra Lives]]=== |
===[[Extra Life|Extra Lives]]=== |
||
| − | *On top of the chandelier in the Dining Room. |
+ | *On top of the chandelier in the Dining Room. Use the [[Flight Pad]] to reach it. |
| − | *In [[the Haunted Church]], |
+ | *In [[the Haunted Church]], behind the organ pipes. |
| − | * |
+ | *Locate a stained glass window towards the back of the church with Banjo and Kazooie's faces on it and jump into it. An extra life, among other items, can be found in here. |
===[[Stop 'n' Swop]]=== |
===[[Stop 'n' Swop]]=== |
||
*'''<font color="green">Green Mystery Egg</font>''' - On top of [[Loggo]]. |
*'''<font color="green">Green Mystery Egg</font>''' - On top of [[Loggo]]. |
||
| − | *'''<font color="cyan">Cyan Mystery Egg</font>''' - In a passage behind a wine cask. It is sealed with an "X". Enter the code, and the lid |
+ | *'''<font color="cyan">Cyan Mystery Egg</font>''' - In a passage behind a wine cask. It is sealed with an "X". Enter the code, and the lid disappears. |
==Mini-games== |
==Mini-games== |
||
| Line 105: | Line 120: | ||
[[File:Mad_Monster_Mansion_Exhibit.jpg|thumb|Mad Monster Mansion Exhibit]] |
[[File:Mad_Monster_Mansion_Exhibit.jpg|thumb|Mad Monster Mansion Exhibit]] |
||
| − | Though it does not physically appear, an incomplete replica of the mansion appears in the third world, [[Banjoland]], along with |
+ | Though it does not physically appear, an incomplete replica of the mansion appears in the third world, [[Banjoland]], along with its own graveyard. It's nature of incompleteness is also referenced by [[Bottles]], as in one of the missions, you were supposed to complete the mansion exhibit by lifting the pieces with the wrench and placing them on the square shaped white patch. However, this was ultimately scrapped and an air race took its place instead. He even states that the delivery van that had mailed the parts had accidentally emptied them into [[Loggo]] and they went straight to the Cut For Deadlines Room. |
===[[Banjoland]] Info=== |
===[[Banjoland]] Info=== |
||
| Line 118: | Line 133: | ||
*Some portraits in this world featured the Pirate, Captain Blackeye who was the original villain for Project Dream before it became Banjo-Kazooie. |
*Some portraits in this world featured the Pirate, Captain Blackeye who was the original villain for Project Dream before it became Banjo-Kazooie. |
||
* The sticker on the front of the [[Banjo-Kazooie]] game cartridge appears to be set in ''Mad Monster Mansion'' |
* The sticker on the front of the [[Banjo-Kazooie]] game cartridge appears to be set in ''Mad Monster Mansion'' |
||
| − | * The music for this level was |
+ | * The music for this level was originally going to be in Project Dream under the title "Bully". Parts of it also were to be in the piece "Chase" |
| − | * This is one out of three worlds where a small Spring Jump Pad can be found. The other two being "[ |
+ | * This is one out of three worlds where a small Spring Jump Pad can be found. The other two being "[[Treasure Trove Cove#Trivia|Treasure Trove Cove]]" and "[[Click Clock Wood]]". They were reduced obviously due space restrictions. |
| + | * Mad Monster Mansion's exterior design is reused to a degree with [[w:c:conker:Count Batula's Mansion|Count Batula's Mansion]] in ''Conker's Bad Fur Day''. |
||
==Names in Other Languages== |
==Names in Other Languages== |
||
| Line 131: | Line 147: | ||
|JapM =Mad Night Mansion |
|JapM =Mad Night Mansion |
||
|Ita = Il Maniero del Mostro |
|Ita = Il Maniero del Mostro |
||
| − | |ItaM = |
+ | |ItaM = Monster Mansion|Ger = Mad Monster Mansion |
|GerM = Mad Monster Mansion}} |
|GerM = Mad Monster Mansion}} |
||
| Line 139: | Line 155: | ||
Image:Mansion.jpg|The Mansion. |
Image:Mansion.jpg|The Mansion. |
||
Image:Dinning_Room.jpg|[[Banjo]] sneaks up on [[Napper]] in the Dining Room of the Mansion. |
Image:Dinning_Room.jpg|[[Banjo]] sneaks up on [[Napper]] in the Dining Room of the Mansion. |
||
| − | 67D580_screen_147AM.png|The Full Map of Mad Monster Mansion world |
+ | 67D580_screen_147AM.png|The Full Map of Mad Monster Mansion world. |
Banjo-Kazooie (U) snap0008.jpg|Full view of the church. |
Banjo-Kazooie (U) snap0008.jpg|Full view of the church. |
||
Banjo-Kazooie (U) snap0004.jpg|Tumblar's Shack. |
Banjo-Kazooie (U) snap0004.jpg|Tumblar's Shack. |
||
Revision as of 20:48, 19 July 2020
Mad Monster Mansion is the seventh world Banjo and Kazooie visit in Banjo-Kazooie. The entrance to this world is located in the Graveyard section of Gruntilda's Lair; this area is past the "Lava Room" on the sixth floor of Gruntilda's Lair. Its picture is located on the seventh floor, specifically the third room you enter through underwater passages. The picture requires 10 Jiggies to complete.
Points of Interest
- The Mansion
- The Well
- Hedge Maze
- The Fountain
- Sewer Barrel
- Tumblar's Shack
- The Haunted Church
- Graveyard
Moves Learned
None
Transformation
- Pumpkin (requires 20 Mumbo Tokens)
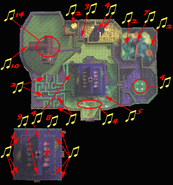
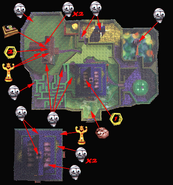
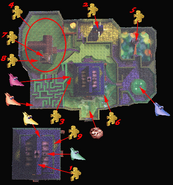
Maps
Collectibles
Jiggies
- Enter the Well: A Jiggy is located inside the well. This Jiggy is accessible as Banjo or the Pumpkin transformation.
- Copy Motzand's Tune: Gain access to the church by Beak Busting a clock switch near the Blue Jinjo's location and running to the entrance before the door closes. You will need to equip the pair of Turbo Trainers and break down the gate leading into the churchyard to enter the church. Once inside, climb up to the organ's scoresheet and Motzand will begin playing keys on his organ. Beak Bust the keys he plays in the order he plays them and after 2 sessions, he will dissipate and a Jiggy will appear at the top of the organ.
- Clear the Tumblar Minigame.
- Help the Pots: Around the churchyard are 5 brown pots. Shoot Eggs from Kazooie's behind into each pot and a Jiggy will pop out of the last one.
- Scale the Church: At the top of the church tower. Use the gravestone near the entrance to climb up.
- Nab from Napper: Ascend to the very top of the mansion and fall through the chimney. Once inside, jump across the chairs onto the dining table without landing on the creaky floor below. Once on the table, simply walk through Napper to collect the Jiggy. If the player attempts to enter this room through the front entrance or the player lands on the floor, Napper will solidfy and the Jiggy will be unobtainable until the duo leaves the room.
- Break the Barrels: Beak Bust the hatch leading into the cellar just outside the churchyard gate. Inside the cellar, break open the southernmost barrel on the left to find the Jiggy.
- Inside Loggo: Break open the window on the second floor, using a Rat-a-tat-rap, that leads into the bathroom. Afterwards, transform into the Pumpkin and ascend to the second floor of the mansion (a small gap near the hedge maze in the churchyard leads to a ramp, granting access to the second floor and is also required for Jiggy #9). Enter the bathroom and jump into Loggo. You will be flushed into the sewers and the Jiggy will be between several Whipcracks and Grille Chompas.
- Inside the Gutter Basin: Using the same ramp from the previous Jiggy, access the second floor of the mansion as the Pumpkin and locate a small hole on one of the corners of the gutters. Sit still on the hole and you will fall into the basin below. The airborne Jiggy will be collected as you drop in.
- Find all 5 Jinjos.
Jinjos
- Blue - On the fountain near the entrance to the world. Use the Shock Spring Pad to reach it.
- Green - At the top of the mansion.
- Orange - At the far corner of the hedge maze.
- Purple - In the third barrel on the right in the cellar.
- Yellow - On top of the canopy bed, located via a third floor window. Use the Shock Spring Pad to reach it.
Extra Honeycombs
- Inside the second floor room, opposite the bathroom. You will need to access this room as the Pumpkin as the Honeycomb Piece is under the floorboards. (Use the same technique from Jiggies #8 and #9 to reach the room.)
- Hovering over the wooden rafters inside the church.
Witch Switch
- Located on the rafters of the church. This spawns a Jiggy in one of the eyes of the big Grunty statue on the sixth floor of Gruntilda's Lair (the room with cobwebs). Either use the Flying Pad from the Freezeezy Peak Witch Switch Jiggy to obtain it, or simply jump down from the brim of the statue and Rat-a-tat-rap the glass to collect it.
Mumbo Tokens
- In the Hedge Maze.
- On top of Tumblar's Shack
- In the left fire flame inside the Dining Room's fireplace.
- In one of the 1881 barrels in the cellar. *
- Inside the sewers. *
- In the well.
- Behind a gravestone by the Haunted Church.
- Inside the church clocktower.
- In the bathroom sink.
- In the bedroom with the Yellow Jinjo, hidden behind a dresser.
- On the narrow middle section of the church rafters.
- Under the Whipcrack guarding the Blue Jinjo.
- In a corner near the fountain.
- In a corner near Tumblar's Shack.
- Next to the small hedge ramp where the Pumpkin ascends to the second floor.
- On the stool inside the church.
Oddly, the Mumbo Tokens marked with (*) are treated by the game as the same Mumbo Token. So collecting one will cause the other to disappear. This essentially means there are a total of 116 Mumbo Tokens in the game, though only 115 are obtainable. This forum remarks on this. However, as stated in this video, it is possible to collect both tokens. As long as you have viewed both Mumbo Tokens (i.e. breaking the barrel cover in the cellar and seeing the token inside of Loggo), both can be collected without the other disappearing.
Extra Lives
- On top of the chandelier in the Dining Room. Use the Flight Pad to reach it.
- In the Haunted Church, behind the organ pipes.
- Locate a stained glass window towards the back of the church with Banjo and Kazooie's faces on it and jump into it. An extra life, among other items, can be found in here.
Stop 'n' Swop
- Green Mystery Egg - On top of Loggo.
- Cyan Mystery Egg - In a passage behind a wine cask. It is sealed with an "X". Enter the code, and the lid disappears.
Mini-games
Characters
Enemies
Banjo-Kazooie: Nuts and Bolts
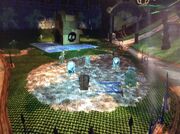
Mad Monster Mansion Exhibit
Though it does not physically appear, an incomplete replica of the mansion appears in the third world, Banjoland, along with its own graveyard. It's nature of incompleteness is also referenced by Bottles, as in one of the missions, you were supposed to complete the mansion exhibit by lifting the pieces with the wrench and placing them on the square shaped white patch. However, this was ultimately scrapped and an air race took its place instead. He even states that the delivery van that had mailed the parts had accidentally emptied them into Loggo and they went straight to the Cut For Deadlines Room.
Banjoland Info
"Spine-tingling area of Banjo-Kazooie where our heroes met Loggo, a dozing ghost called Napper and an organ-playing spectral hand named Motzand. Was it Grunty's holiday home? Who knows?"
Trivia
- This is the only world in Banjo-Kazooie that contains two Stop 'n' Swop items: the Green Mystery Egg and the Cyan Mystery Egg.
- When Grunty is kidnapping Tooty, this stage's music can be heard sped up.
- The church in Mad Monster Mansion is modeled after the real church in Twycross (the home base of Rare).
- Mad Monster Mansion's entrance in the beta version of the game was thought to be opposite Freezeezy Peak, behind Gobi's Valley or in the water level raising room.
- Because of the way the Flower Urns talk, people often mistakenly hear the pots say something else of vulgar nature. Rareware has mentioned that this is untrue and that the pots merely say "Thank you". Grant Kirkhope, the voice actor of the urns, confirmed this on a special episode of "Game Grumps", called "Guest Grumps", on YouTube. He also stated that it took many takes before the current utterance of "Thank you" was accepted as being clearly audible.[1]
- Some portraits in this world featured the Pirate, Captain Blackeye who was the original villain for Project Dream before it became Banjo-Kazooie.
- The sticker on the front of the Banjo-Kazooie game cartridge appears to be set in Mad Monster Mansion
- The music for this level was originally going to be in Project Dream under the title "Bully". Parts of it also were to be in the piece "Chase"
- This is one out of three worlds where a small Spring Jump Pad can be found. The other two being "Treasure Trove Cove" and "Click Clock Wood". They were reduced obviously due space restrictions.
- Mad Monster Mansion's exterior design is reused to a degree with Count Batula's Mansion in Conker's Bad Fur Day.
Names in Other Languages
| Language | Name | Meaning |
|---|---|---|
| Japanese | マッドナイトまんしょん Maddo Naito Mansyon |
Mad Night Mansion |
| Spanish | La Mansión del Monstruo Loco | The Mansion of Crazy Monsters |
| French | Manoir du Monstre Malsain | Unhealthy Monster Manor |
| German | Mad Monster Mansion | Mad Monster Mansion |
| Italian | Il Maniero del Mostro | Monster Mansion |
Gallery
| Worlds | Mumbo's Mountain · Treasure Trove Cove · Clanker's Cavern · Bubblegloop Swamp · Freezeezy Peak · Gobi's Valley · Mad Monster Mansion · Rusty Bucket Bay · Click Clock Wood |
|---|---|
| Overworld | Spiral Mountain · Gruntilda's Lair · Grunty's Furnace Fun · Top of the Tower |
| Cut Worlds | Fungus Forest · Mount Fire Eyes · Temple Test Level |
