(→Trivia) Tag: rte-wysiwyg |
mNo edit summary |
||
| (21 intermediate revisions by 8 users not shown) | |||
| Line 1: | Line 1: | ||
{{Infobox world |
{{Infobox world |
||
| ⚫ | |||
|game = ''[[Banjo-Kazooie]]'' |
|game = ''[[Banjo-Kazooie]]'' |
||
| + | |type = Level |
||
|theme = Tribal Village |
|theme = Tribal Village |
||
| + | Grassy Hillside |
||
| − | |jiggies needed = 1 |
||
| + | |token = 5 |
||
| ⚫ | |||
| + | |honeycomb = 2 |
||
| − | |transformation = [[Termite Banjo|Termite]] |
+ | |transformation = [[Termite Banjo|Termite]] |
| ⚫ | '''Mumbo's Mountain''' is the first of nine worlds |
||
| + | |prerequisite = 1 Jiggy |
||
| − | |||
| + | |previous = [[Gruntilda's Lair]] (overworld) |
||
| + | |next = [[Treasure Trove Cove]] |
||
| ⚫ | }}'''Mumbo's Mountain''' is the first of nine worlds in ''[[Banjo-Kazooie]]''. The entrance to this level is located just to the right of the entrance to [[Gruntilda's Lair]]. The puzzle is conveniently located right next to the world's entrance beyond a small fenced area and only requires one [[Jiggy]] to complete. This is the first world to introduce [[Mumbo Jumbo]]. |
||
==Points of Interest== |
==Points of Interest== |
||
| + | *Entrance Area |
||
*Village |
*Village |
||
**[[Mumbo's Skull]] |
**[[Mumbo's Skull]] |
||
**[[Juju]] |
**[[Juju]] |
||
*[[Ticker's Tower]] |
*[[Ticker's Tower]] |
||
| − | *Stonehenge |
+ | *Stonehenge-like Ruins |
*[[Conga]]'s Tree |
*[[Conga]]'s Tree |
||
| + | *Lake |
||
| − | == |
+ | ==Moves Learned== |
| − | + | ===[[Talon Trot]]=== |
|
| + | Hold the Z button and press the right C button to bring Kazooie out and allow her to carry Banjo, moving the analog stick to walk and the A button to jump. While in Talon Trot, Banjo and Kazooie can not only get around faster, but also move up hills that would initially cause Banjo to slide down. |
||
| − | *[[Beak Buster]] |
||
| − | + | ===[[Beak Buster]]=== |
|
| + | Press the A button to jump, and then the Z button to do a ground pound with Kazooie. |
||
| − | |||
| + | ===[[Egg Firing]]=== |
||
| + | Hold the Z button, then press the up C button to fire [[eggs]] out of Kazooie's beak or the down C button to fire eggs from behind. |
||
==Maps== |
==Maps== |
||
<gallery> |
<gallery> |
||
| Line 29: | Line 38: | ||
==Collectibles== |
==Collectibles== |
||
===[[Jiggy|Jiggies]]=== |
===[[Jiggy|Jiggies]]=== |
||
| − | #'''Destroy |
+ | #'''Destroy Conga's Blocks:''' At Conga's Tree, you must make [[Conga]] throw an orange at you while you are on top of one of the orange blocks on the ground. Make him hit all three blocks to obtain a [[Jiggy]]. |
| − | #''' |
+ | #'''Feed Chimpy:''' Climb up Conga's Tree and grab the orange. Walk over to [[Chimpy]] and give him the orange in exchange for a Jiggy. Chimpy will also raise the stump to access the ledges above. |
| − | #'''Defeat Conga:''' Stand on the top tree platform so you are at equal height with Conga and fire |
+ | #'''Defeat Conga:''' Stand on the top tree platform so you are at equal height with Conga and fire [[Eggs]] at him when his guard is down. After 3 hits, he will drop a Jiggy. |
| − | #''' |
+ | #'''Outside Mumbo's Skull:''' The Jiggy is inside the left eye of [[Mumbo's Skull]]. [[Flap Flip]] to reach it. |
| − | #'''Destroy the Huts:''' Destroy the huts in |
+ | #'''Destroy the Huts:''' Destroy the huts in the village with the [[Beak Buster]]. The last one destroyed contains a Jiggy. |
| − | #'''Near the |
+ | #'''Near the Ruins:''' In the middle of the Stonehenge-like ruins, near the molehill where [[Bottles]] teaches you the [[Talon Trot]]. |
| − | #'''Feed [[Juju]]:''' Fire eggs into each mouth of the Juju Totem Pole until they all have disappeared. |
+ | #'''Feed [[Juju]]:''' Fire eggs into each mouth of the Juju Totem Pole until they all have disappeared and a Jiggy will appear. '''Be sure to collect the [[Extra Honeycomb]] before feeding the last segment!''' |
| − | #''' |
+ | #'''Scale the Hill:''' On the steep hill between the Village and the Entrance area. Can be obtained using the [[Talon Trot]], as the [[Termite]] or by jumping down from the top of the hill. |
| − | #''' |
+ | #'''Climb Ticker's Tower:''' Transform into a [[Termite]] and enter Ticker's Tower. Inside, scale the ledges and webs to reach the top and a Jiggy will be outside at the very top of the tower. |
#'''Find the Jinjos:''' Find all 5 Jinjos. |
#'''Find the Jinjos:''' Find all 5 Jinjos. |
||
===[[Jinjo]]s=== |
===[[Jinjo]]s=== |
||
*'''<font color="blue">Blue</font>''' - On an island in the middle of the lake. |
*'''<font color="blue">Blue</font>''' - On an island in the middle of the lake. |
||
| − | *'''<font color="green">Green</font>''' - In |
+ | *'''<font color="green">Green</font>''' - In the 4th destroyed hut in the village. |
| − | *'''<font color="orangered">Orange</font>''' - On the Stonehenge |
+ | *'''<font color="orangered">Orange</font>''' - On the Stonehenge-like ruins. |
*'''<font color="fuchsia">Purple</font>''' - On a platform near the Entrance area. |
*'''<font color="fuchsia">Purple</font>''' - On a platform near the Entrance area. |
||
*'''<font color="yellow">Yellow</font>''' - On the slope between the Ruins and Conga's Tree. |
*'''<font color="yellow">Yellow</font>''' - On the slope between the Ruins and Conga's Tree. |
||
===[[Extra Honeycomb]]s=== |
===[[Extra Honeycomb]]s=== |
||
| − | *In a small alcove on the hill above the lake. |
+ | *In a small alcove on the hill above the lake. Can be obtained as the [[Termite]] or by carefully jumping down from the top of the hill. |
| − | *When one segment of the [[Juju]] Totem Pole is left, jump on top of it and [[Flap Flip]] to retrieve the |
+ | *When one segment of the [[Juju]] Totem Pole is left, jump on top of it and [[Flap Flip]] to retrieve the Extra Honeycomb. |
===[[Witch Switch]]=== |
===[[Witch Switch]]=== |
||
| − | *Located on the |
+ | *Located on the edges near Conga's Tree. Banjo must have already raised the tree stump on which [[Chimpy]] is standing (see Jiggy #2). The [[Jiggy]] appears at the top of the world entrance in [[Gruntilda's Lair]]. Exit the world as the [[Termite Banjo|Termite]] and climb the mountain to get it. |
===[[Mumbo Token]]s=== |
===[[Mumbo Token]]s=== |
||
*Behind the Purple Jinjo. |
*Behind the Purple Jinjo. |
||
| − | *On one of the edges near |
+ | *On one of the edges near [[Conga]] . |
| − | *Inside |
+ | *Inside [[Ticker's Tower]]. |
| − | *Behind the Stonehenge Ruins. |
+ | *Behind the Stonehenge-like Ruins. |
| − | *Under the small |
+ | *Under the small ramp to [[Mumbo's Skull]]. |
===[[Extra Life|Extra Lives]]=== |
===[[Extra Life|Extra Lives]]=== |
||
| − | *At the top of |
+ | *At the top of Ticker's Tower. |
| − | *Inside |
+ | *Inside the 5th destroyed hut in the village. |
==Mini-games== |
==Mini-games== |
||
*None |
*None |
||
| + | ==Transformation== |
||
| + | *[[Termite]] (requires 5 Mumbo Tokens) |
||
==Characters== |
==Characters== |
||
| Line 75: | Line 86: | ||
==Enemies== |
==Enemies== |
||
| − | *[[Beehive]] |
+ | *[[Beehive]] (x2) |
| − | *[[Ticker]] |
+ | *[[Ticker]] (x7) |
| − | *[[Grublin]] |
+ | *[[Grublin]] (x5) |
| − | *[[Bigbutt]] |
+ | *[[Bigbutt]] (x1) |
*[[Conga]] (Boss) |
*[[Conga]] (Boss) |
||
| Line 91: | Line 102: | ||
==Trivia== |
==Trivia== |
||
| − | *Originally, the music for this world was different, but [[Grant Kirkhope]] was asked to change it. The original song can be heard in |
+ | *Originally, the music for this world was different, but [[Grant Kirkhope]] was asked to change it. The original song can be heard in [[Ticker's Tower]].<ref>http://grantkirkhope.com/banjokazooie.html</ref> |
| − | *Of all of the worlds which feature a transformation in both ''[[Banjo-Kazooie]]'' and ''[[Banjo-Tooie]],'' this is the only one where the transformation can be skipped and still be able to get 100%. Using a combination of very quick jumping and possibly the Beak Buster, both Ticker's Tower and the mountain above the world's entrance can be scaled without the Termite |
+ | *Of all of the worlds which feature a transformation in both ''[[Banjo-Kazooie]]'' and ''[[Banjo-Tooie]],'' this is the only one where the transformation can be skipped and still be able to get 100%. Using a combination of very quick jumping and possibly the Beak Buster, both Ticker's Tower and the mountain above the world's entrance can be scaled without the Termite. |
| − | * This is the only world that neither a [ |
+ | * This is the only world that neither a [[Flight Pad]] nor [[Shock Jump Pad]] can be found. All other worlds have both or at least one of them. |
| + | *A recreated version of Mumbo's Mountain was used as a beta level for testing the vehicle mechanics in'' [[Banjo-Kazooie: Nuts & Bolts]]''.<ref>https://www.youtube.com/watch?v=_R2sCzlT5Uc</ref> |
||
| + | *This is the only world, besides [[Spiral Mountain]], where Red Feathers cannot be found and one of two worlds where Gold Feathers cannot be found. |
||
| + | [[File:Banjo_kazooie_unused_characters_ed_bryan.jpg|thumb|Unused character designs intended for "what became ''Mumbo's Mountain''. Probably!"]] |
||
| + | *[[Ed Bryan]] shared this image of two unused character designs from Banjo-Kazooie - a tiger and a caveman - who were intended to be used in "what became ''Mumbo's Mountain''. Probably!"<ref>https://twitter.com/mingellasfella/status/880718614281768963?s=20</ref> The tiger's face strongly resembles [[Officer Unogopaz]] and the [[Moggy (Enemy)|Moggies]] from ''[[Banjo-Tooie]]'''s [[Mayahem Temple]]. Mayahem Temple appears to have been dreamt up during development of ''Banjo-Kazooie'' ([[Grant Kirkhope]] had composed [https://youtu.be/AP78icCkhBk a version of Mayahem Temple's theme] very early on, for instance<ref>https://youtu.be/kq-fpnnGzyU?t=372</ref>) alongside other worlds like [[Glitter Gulch Mine]] which were also shelved until the sequel. With this in mind it seems likely that either Ed meant to say "Mayahem Temple", or Mayahem Temple emerged from early unused ideas for Mumbo's Mountain. Incidentally, Mayahem Temple also features [[Unga Bunga|cavemen]], though they look quite different to the one shown here. |
||
==Names in Other Languages== |
==Names in Other Languages== |
||
| Line 114: | Line 129: | ||
==References== |
==References== |
||
{{Reflist}} |
{{Reflist}} |
||
| − | |||
{{BKWorlds}} |
{{BKWorlds}} |
||
[[de:Mumbo's Mountain]] |
[[de:Mumbo's Mountain]] |
||
Revision as of 23:53, 19 February 2020
Mumbo's Mountain is the first of nine worlds in Banjo-Kazooie. The entrance to this level is located just to the right of the entrance to Gruntilda's Lair. The puzzle is conveniently located right next to the world's entrance beyond a small fenced area and only requires one Jiggy to complete. This is the first world to introduce Mumbo Jumbo.
Points of Interest
- Entrance Area
- Village
- Ticker's Tower
- Stonehenge-like Ruins
- Conga's Tree
- Lake
Moves Learned
Talon Trot
Hold the Z button and press the right C button to bring Kazooie out and allow her to carry Banjo, moving the analog stick to walk and the A button to jump. While in Talon Trot, Banjo and Kazooie can not only get around faster, but also move up hills that would initially cause Banjo to slide down.
Beak Buster
Press the A button to jump, and then the Z button to do a ground pound with Kazooie.
Egg Firing
Hold the Z button, then press the up C button to fire eggs out of Kazooie's beak or the down C button to fire eggs from behind.
Maps
")
")
")
Collectibles
Jiggies
- Destroy Conga's Blocks: At Conga's Tree, you must make Conga throw an orange at you while you are on top of one of the orange blocks on the ground. Make him hit all three blocks to obtain a Jiggy.
- Feed Chimpy: Climb up Conga's Tree and grab the orange. Walk over to Chimpy and give him the orange in exchange for a Jiggy. Chimpy will also raise the stump to access the ledges above.
- Defeat Conga: Stand on the top tree platform so you are at equal height with Conga and fire Eggs at him when his guard is down. After 3 hits, he will drop a Jiggy.
- Outside Mumbo's Skull: The Jiggy is inside the left eye of Mumbo's Skull. Flap Flip to reach it.
- Destroy the Huts: Destroy the huts in the village with the Beak Buster. The last one destroyed contains a Jiggy.
- Near the Ruins: In the middle of the Stonehenge-like ruins, near the molehill where Bottles teaches you the Talon Trot.
- Feed Juju: Fire eggs into each mouth of the Juju Totem Pole until they all have disappeared and a Jiggy will appear. Be sure to collect the Extra Honeycomb before feeding the last segment!
- Scale the Hill: On the steep hill between the Village and the Entrance area. Can be obtained using the Talon Trot, as the Termite or by jumping down from the top of the hill.
- Climb Ticker's Tower: Transform into a Termite and enter Ticker's Tower. Inside, scale the ledges and webs to reach the top and a Jiggy will be outside at the very top of the tower.
- Find the Jinjos: Find all 5 Jinjos.
Jinjos
- Blue - On an island in the middle of the lake.
- Green - In the 4th destroyed hut in the village.
- Orange - On the Stonehenge-like ruins.
- Purple - On a platform near the Entrance area.
- Yellow - On the slope between the Ruins and Conga's Tree.
Extra Honeycombs
- In a small alcove on the hill above the lake. Can be obtained as the Termite or by carefully jumping down from the top of the hill.
- When one segment of the Juju Totem Pole is left, jump on top of it and Flap Flip to retrieve the Extra Honeycomb.
Witch Switch
- Located on the edges near Conga's Tree. Banjo must have already raised the tree stump on which Chimpy is standing (see Jiggy #2). The Jiggy appears at the top of the world entrance in Gruntilda's Lair. Exit the world as the Termite and climb the mountain to get it.
Mumbo Tokens
- Behind the Purple Jinjo.
- On one of the edges near Conga .
- Inside Ticker's Tower.
- Behind the Stonehenge-like Ruins.
- Under the small ramp to Mumbo's Skull.
Extra Lives
- At the top of Ticker's Tower.
- Inside the 5th destroyed hut in the village.
Mini-games
- None
Transformation
- Termite (requires 5 Mumbo Tokens)
Characters
Enemies
Banjo-Kazooie: Nuts & Bolts
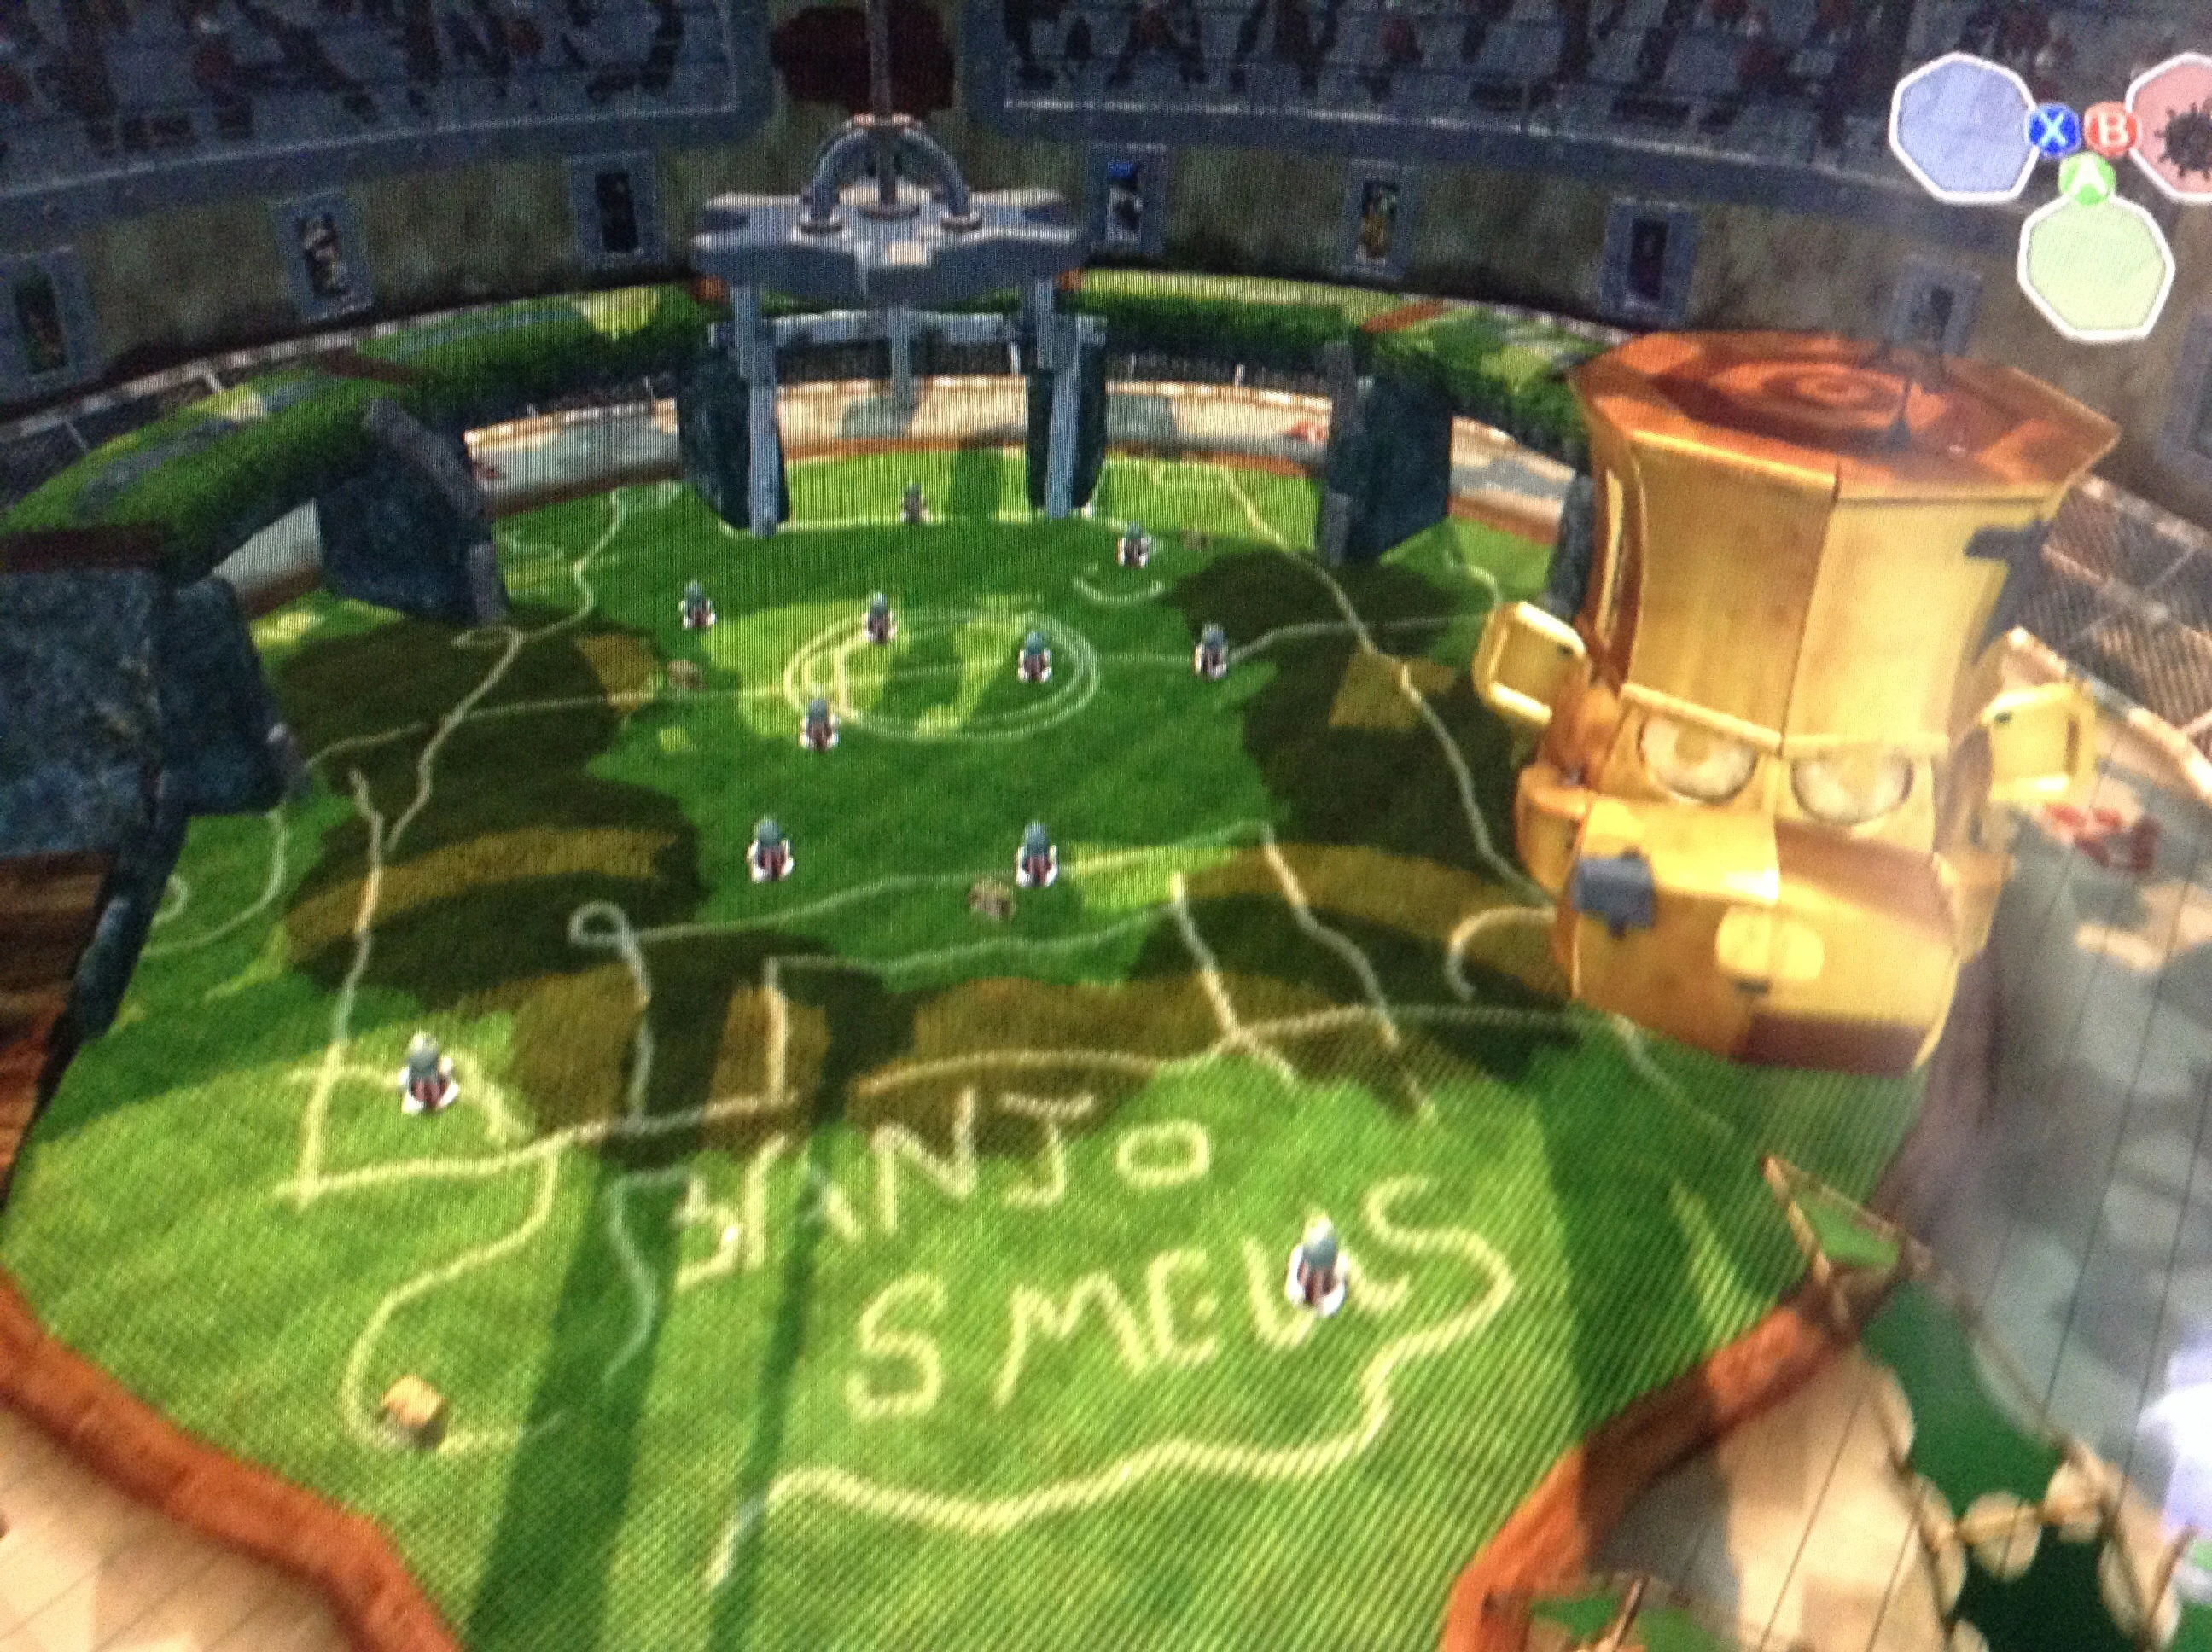
The Stonehenge ruins and the particular slope where it rests are recreated in Nuts & Bolts' third world, Banjoland as its own segment. It is larger here and sits amongst the Kickball Pitch, Golden Goliath and Targitzan on the top of the hill.
Banjoland Info
"Stonehenge. Brought here from Mumbo's Mountain, Banjo-Kazooie's first ever challenge level. L.O.G. has needed to enlarge it slightly and apply new textures to make it look a little less last-last-gen."
Trivia
- Originally, the music for this world was different, but Grant Kirkhope was asked to change it. The original song can be heard in Ticker's Tower.[1]
- Of all of the worlds which feature a transformation in both Banjo-Kazooie and Banjo-Tooie, this is the only one where the transformation can be skipped and still be able to get 100%. Using a combination of very quick jumping and possibly the Beak Buster, both Ticker's Tower and the mountain above the world's entrance can be scaled without the Termite.
- This is the only world that neither a Flight Pad nor Shock Jump Pad can be found. All other worlds have both or at least one of them.
- A recreated version of Mumbo's Mountain was used as a beta level for testing the vehicle mechanics in Banjo-Kazooie: Nuts & Bolts.[2]
- This is the only world, besides Spiral Mountain, where Red Feathers cannot be found and one of two worlds where Gold Feathers cannot be found.

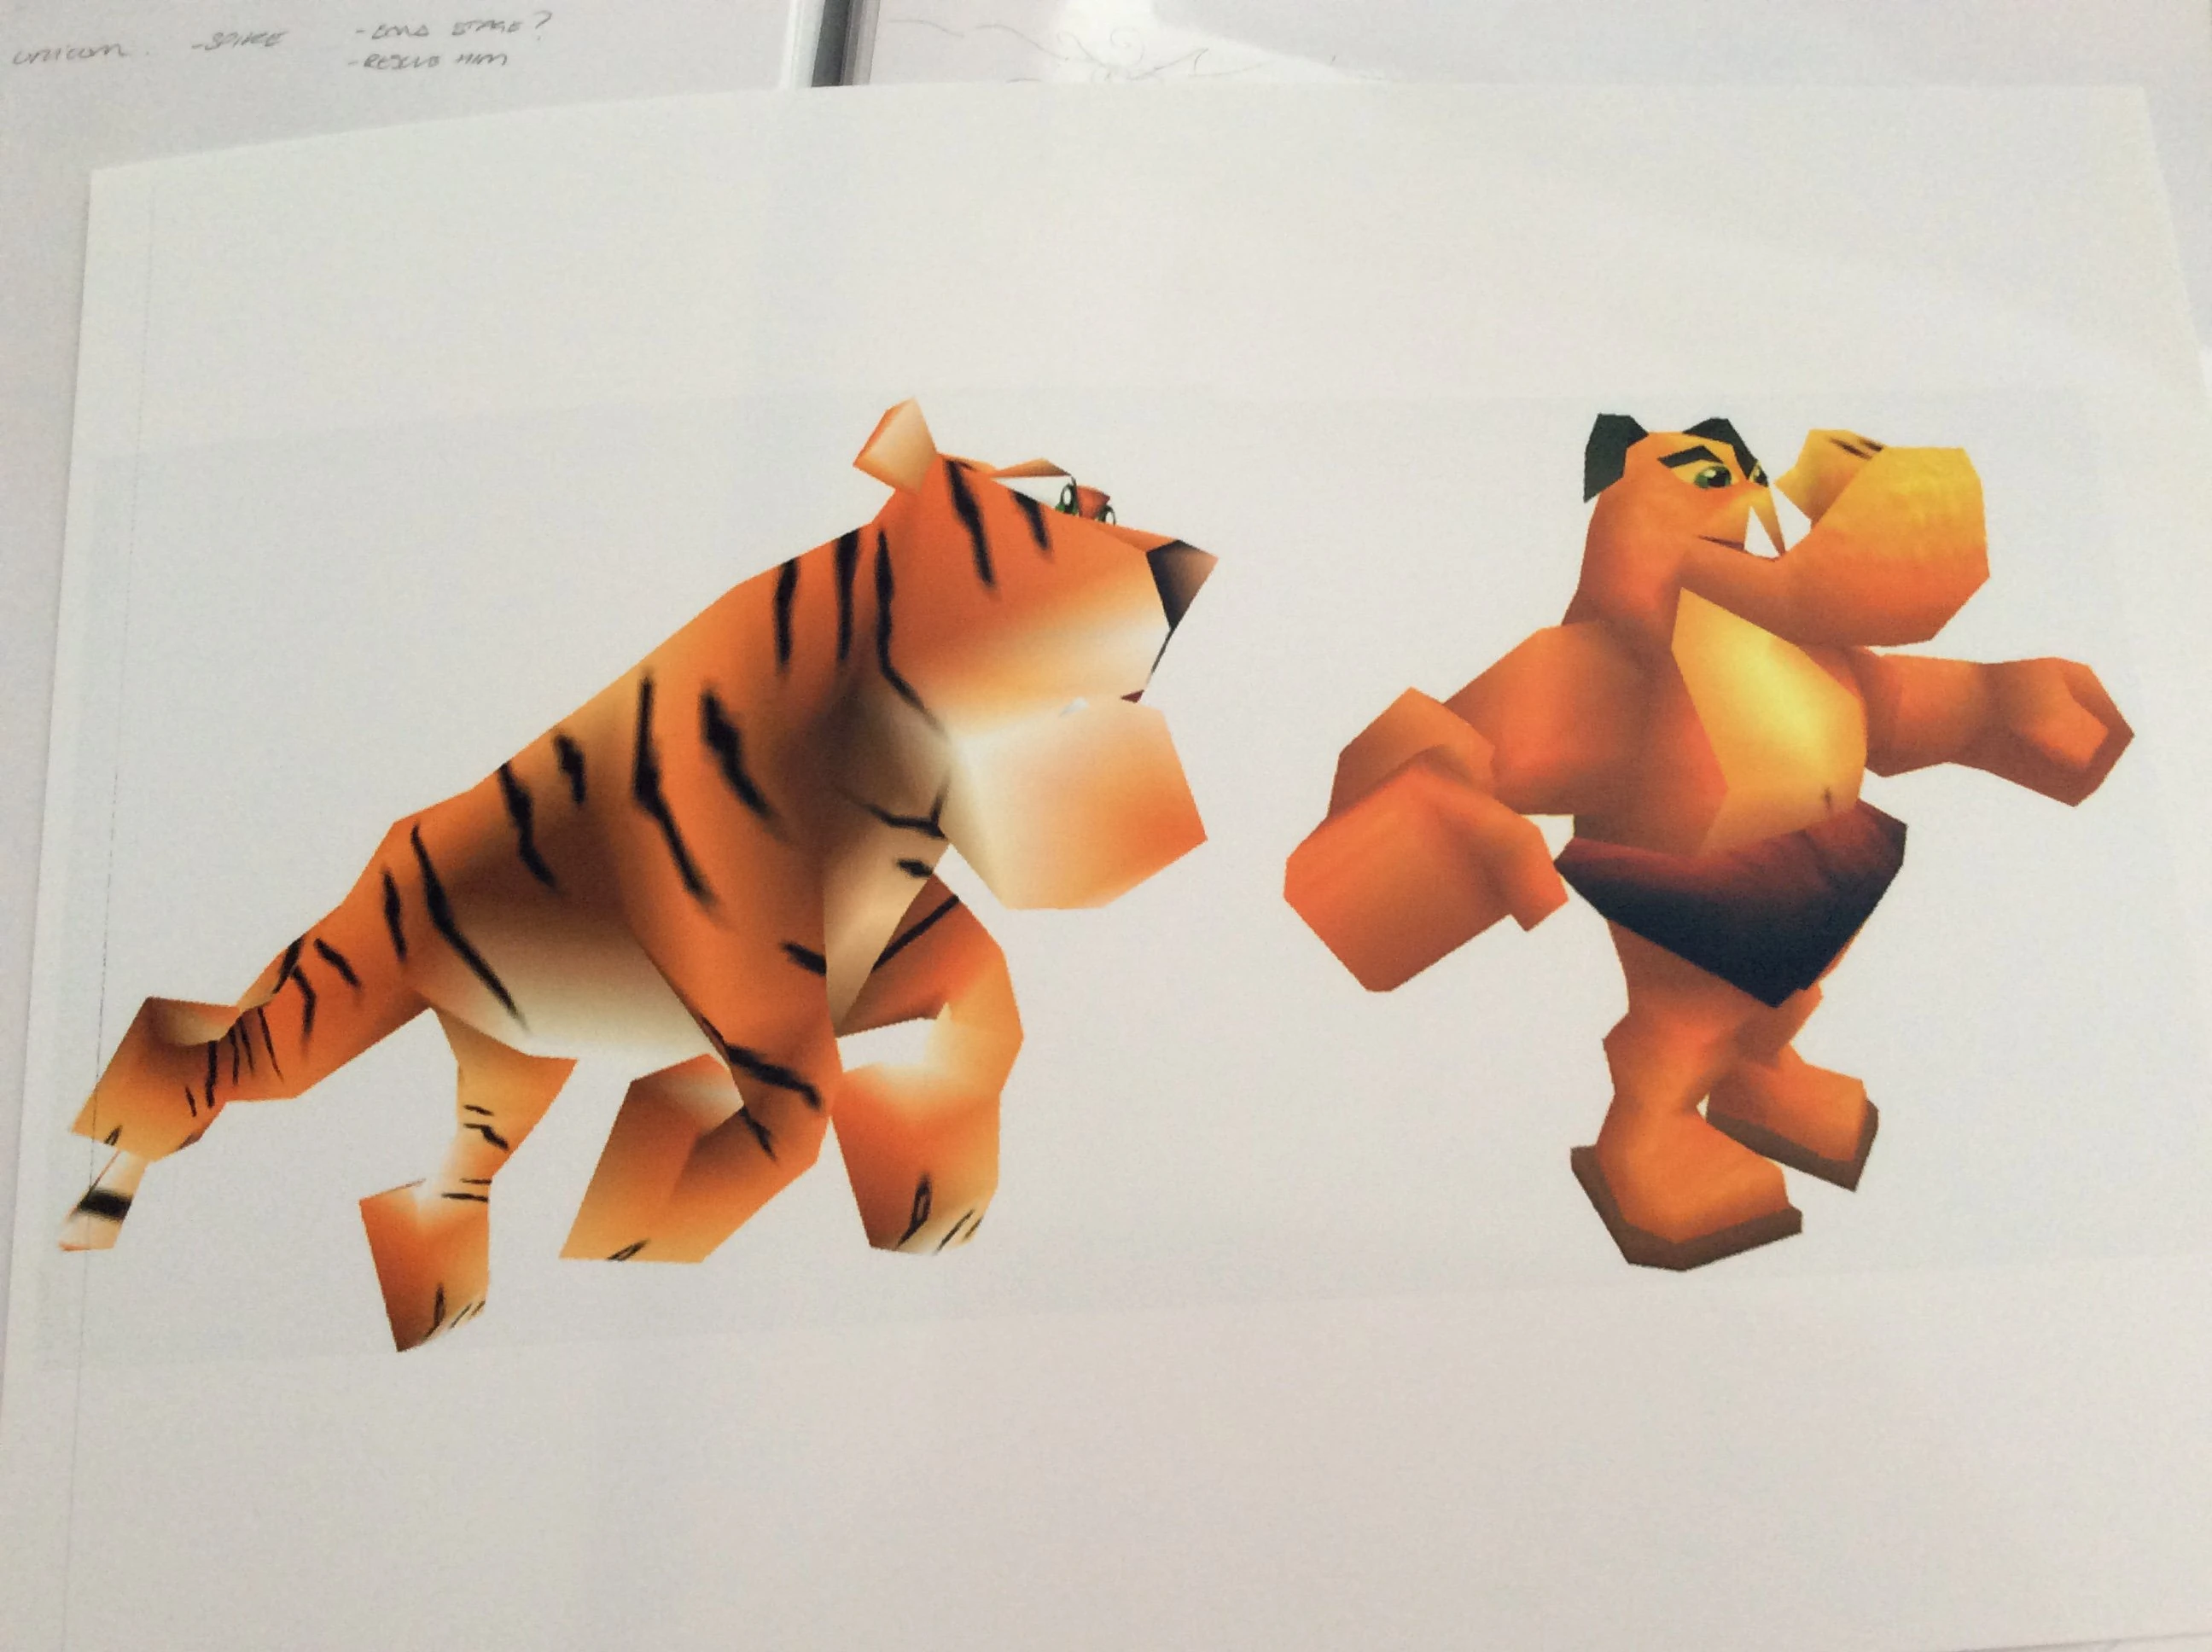
Unused character designs intended for "what became Mumbo's Mountain. Probably!"
- Ed Bryan shared this image of two unused character designs from Banjo-Kazooie - a tiger and a caveman - who were intended to be used in "what became Mumbo's Mountain. Probably!"[3] The tiger's face strongly resembles Officer Unogopaz and the Moggies from Banjo-Tooie's Mayahem Temple. Mayahem Temple appears to have been dreamt up during development of Banjo-Kazooie (Grant Kirkhope had composed a version of Mayahem Temple's theme very early on, for instance[4]) alongside other worlds like Glitter Gulch Mine which were also shelved until the sequel. With this in mind it seems likely that either Ed meant to say "Mayahem Temple", or Mayahem Temple emerged from early unused ideas for Mumbo's Mountain. Incidentally, Mayahem Temple also features cavemen, though they look quite different to the one shown here.
Names in Other Languages
| Language | Name | Meaning |
|---|---|---|
| Japanese | マンボまうんてん Manbo Maunten |
Mumbo Mountain |
| Spanish | Montaña de Mumbo (BKNB) | Mumbo's Mountain |
| French | Montagne de Mumbo | Mumbo's Mountain |
| German | Mumbo's Mountain | Mumbo's Mountain |
| Italian | Montagna di Mumbo | Mumbo's Mountain |
Gallery
References
| Worlds | Mumbo's Mountain · Treasure Trove Cove · Clanker's Cavern · Bubblegloop Swamp · Freezeezy Peak · Gobi's Valley · Mad Monster Mansion · Rusty Bucket Bay · Click Clock Wood |
|---|---|
| Overworld | Spiral Mountain · Gruntilda's Lair · Grunty's Furnace Fun · Top of the Tower |
| Cut Worlds | Fungus Forest · Mount Fire Eyes · Temple Test Level |